Audio Probe is a desktop application which can be used to inspect sound in Audio subsystem of a Smart Remote device. It is useful for capturing and injecting audio data before it gets compressed and sent via Bluetooth. The example use cases are:
- Getting uncompressed audio data from the PDM microphone.
- Optimizing audio algorithms running on an nRF device.
- Testing a codec together with processing and compression algorithms running in firmware by injecting sound from a file to be compressed.
The tool has the following requirements:
- J-Link RTT connection for transferring audio data. nRF52 DK has a built-in J-Link OB with 1 MHz speed which should be enough for default audio sampling rate of 16.125 kHz. For higher rates, or for simultaneous inject and tap, external J-Link probes are recommended.
- Interactive Command Line Interface for runtime configuration of channels and probe points on target.
- Minimum 2 kB RAM on a device for buffering the sound.
Behavior
Audio Probe is designed to have minimal impact on the behavior of Smart Remote. It does not trigger a start or a stop of an audio transmission. It acts as a sniffer - when audio is running Audio Probe saves sound buffers in the RTT channel, fetch it to a computer, and save in a wave file. When inject point is chosen, the sound is read from the wave file on the computer and sent to Smart Remote, instead of the default samples from the microphone or the previous processing stage.
Summing up, the tool exhibits two kinds of behavior.
- tap point: get uncompressed audio from a target to the host. This does not disrupt getting compressed audio on BLE.
- inject point: send uncompressed audio from the host to a target, discarding samples from the microphone or the previous processing stage. This does not disrupt "normal" audio over BLE either, however the stream from the microphone is replaced by the one from the host.
Setup
Follow this procedure to set up Audio Probe with Smart Remote.
- Compile the firmware with the "Audio Probe" option enabled. By default, 1 tap channel is chosen.
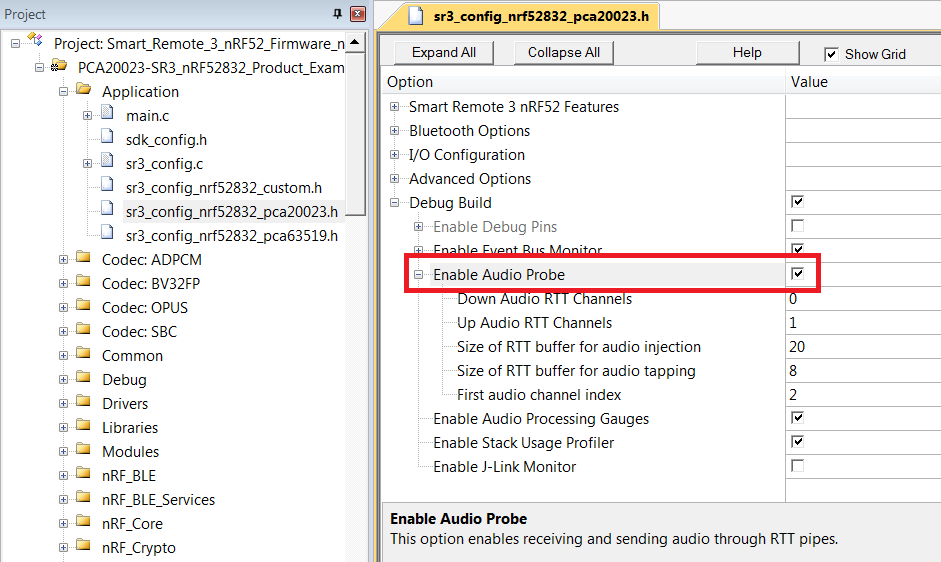 Enabling Audio Probe in Smart Remote firmware
- Compile and flash the firmware.
- Make sure that J-Link is connected.
- You can run Audio Probe from the desktop icon or from the Linux terminal using the
audioprobecommand. The program connects to Smart Remote and provides you with log messages from the firmware. To navigate up and down in the terminal window, useShift + PageUpandShift + PageDown.
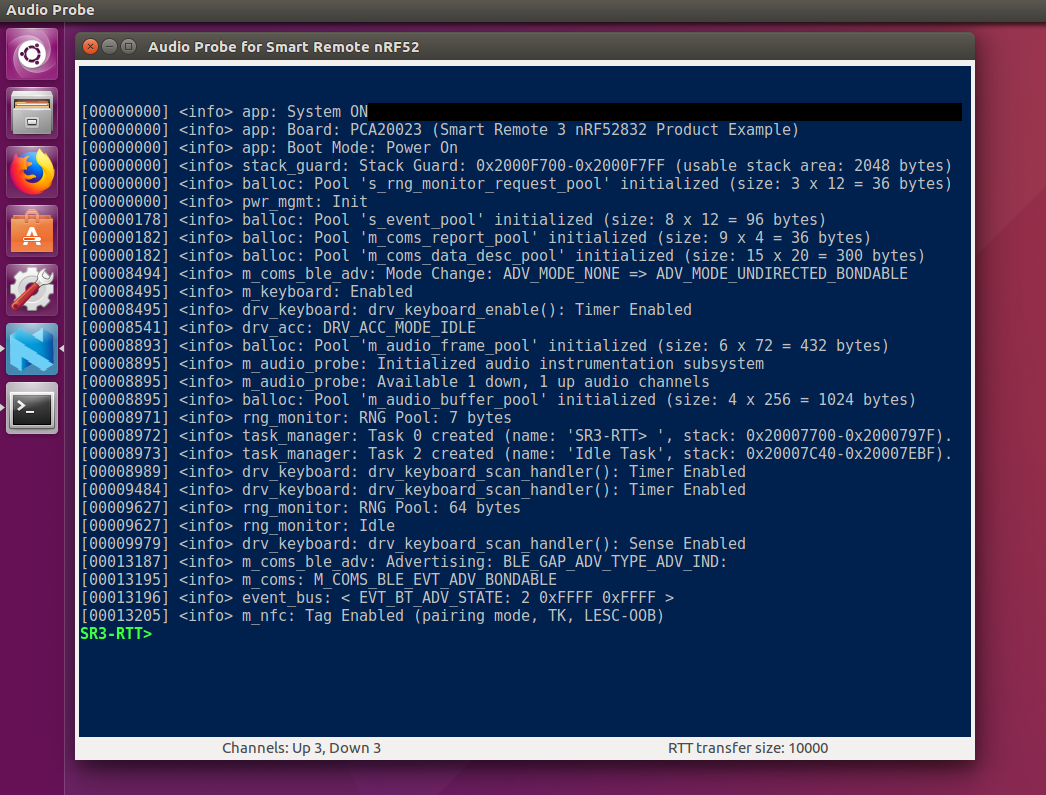 Audio Probe connected to Smart Remote over RTT
- To check which audio probe channels are enabled in the Smart Remote firmware, you can open RTT channels info from the menu RTT (shortcut
Ctrl+E). By default, RTT is also used by the logger and CLI (channel 0) and may be used by J-Link tools (channel 1).
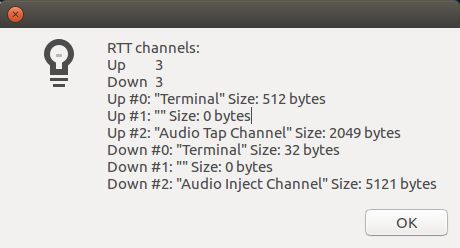 RTT channels enabled in the firmware
- To use the Smart Remote audio subsystem, it is required to pair the device with the host. Any host that supports audio streaming from Smart Remote (using, for example, NVS or ATVV) can be used. Next, check if the audio input is properly configured.
Tapping audio
To tap audio from the Smart Remote audio subsystem, go to menu Audio Chain and open the Audio Chain Pipes window (shortcut Ctrl+A). From this window, connect the output audio channel to a chosen tap point.
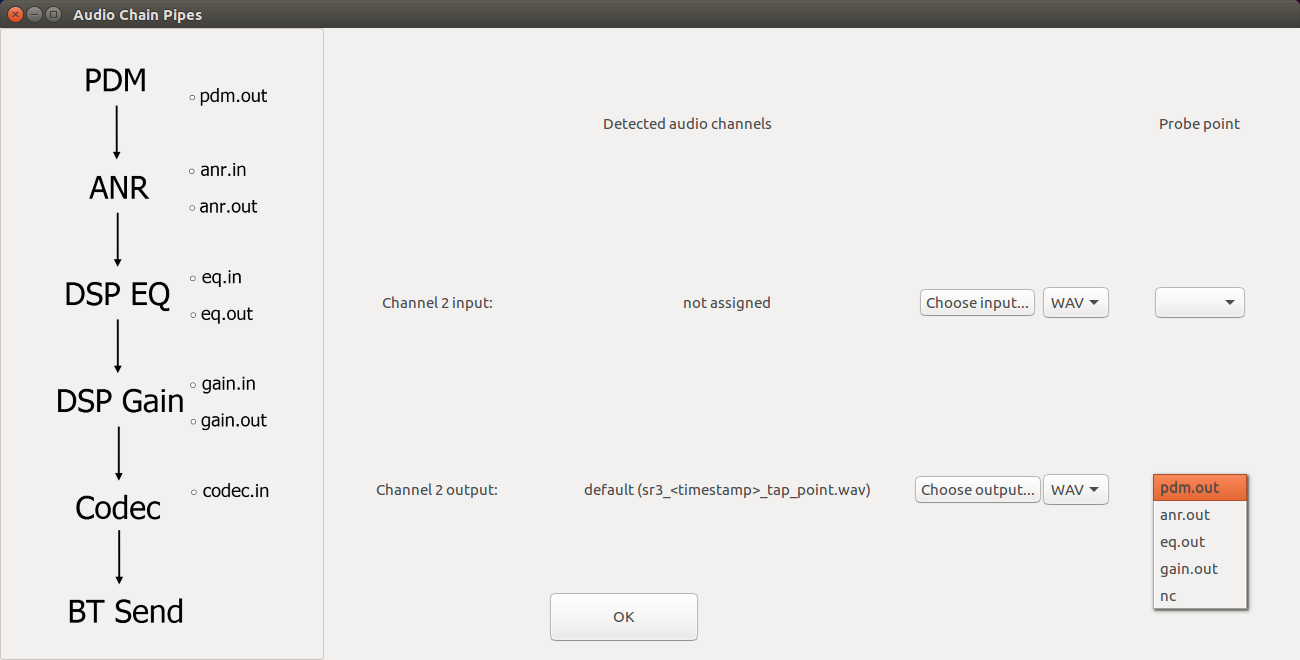
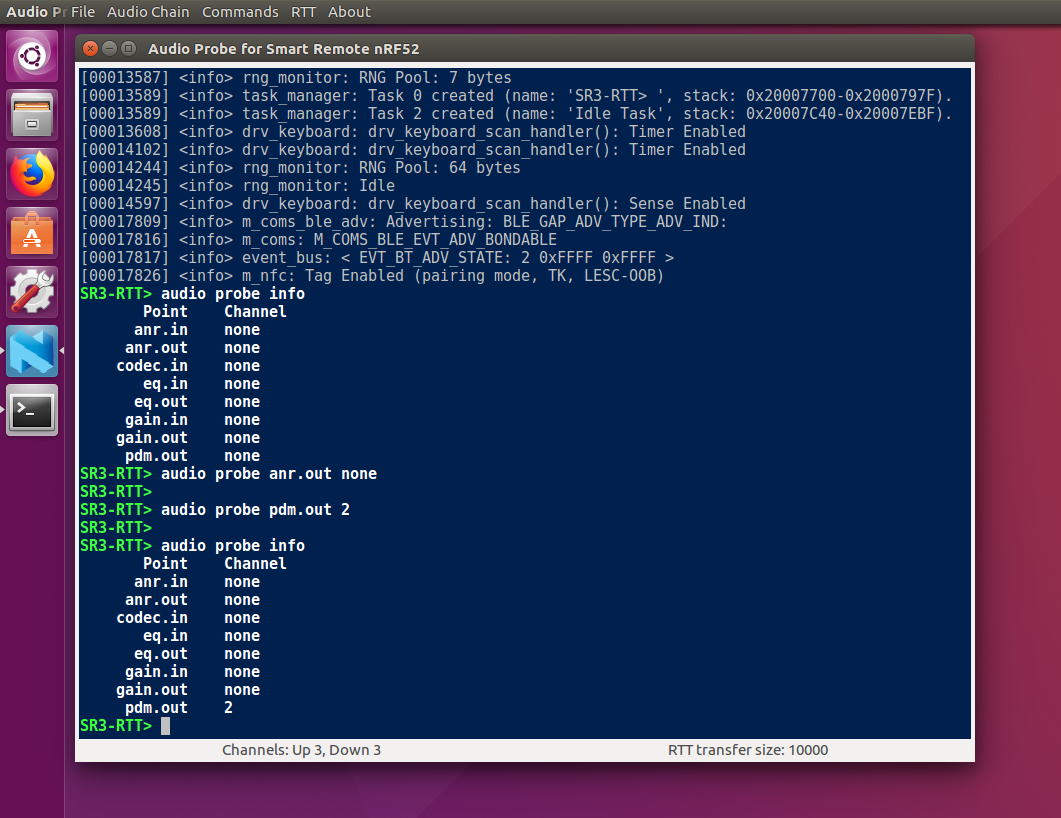
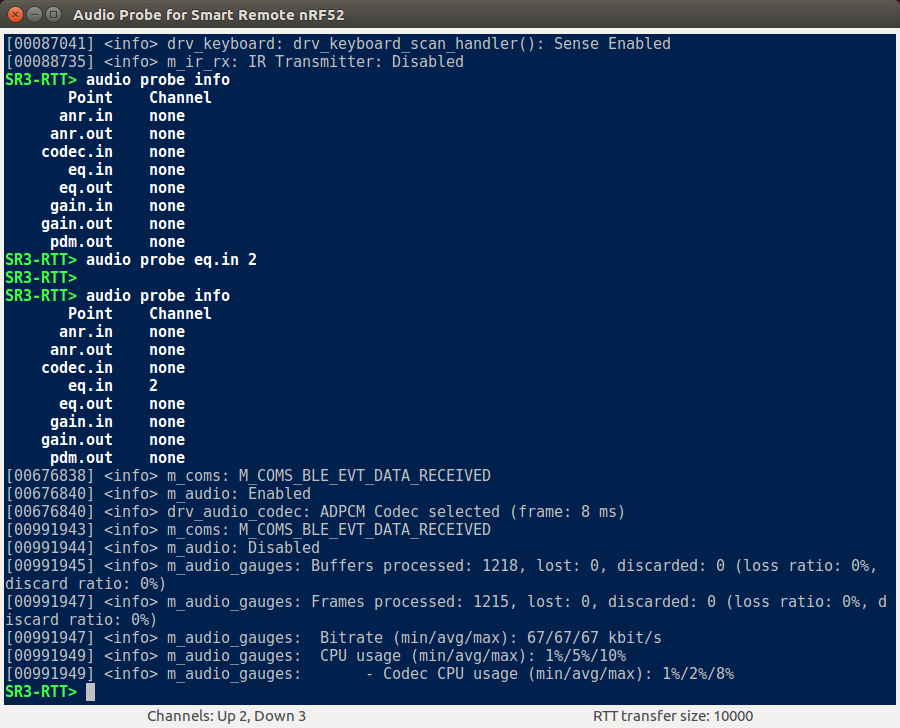
Changing a probe point generates and sends a CLI command in form audio probe <point> <channel>. You can check the active probe points using the audio probe info command, which can be issued automatically by pressing Ctrl+S.
Now, with probe point connected, activate audio streaming in Smart Remote. This can be triggered by any paired host.
On the Ubuntu NVS host, audio stream can be started in one of at least three ways:
- Go to Ubuntu System Settings, choose Sound and then Input tab, as shown here. Double-click NVS device source hidraw, to start the audio transmission.
- Record sound from an NVS input device. For default audio parameters of Smart Remote, this can be done using the following command:
parec -v --device=nvs.hidraw1 --rate=16125 --channels=1 --file-format=wav record.wav
- Perform voice search with Google Chrome.
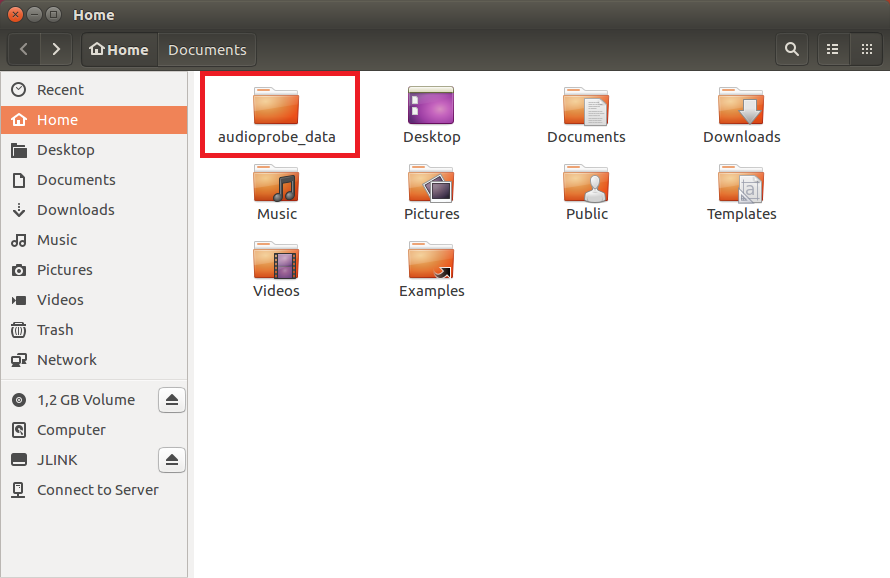
During an audio transmission, Audio Probe saves data from the chosen probe point and saves it to a file. By default, output files can be found in the user home directory, under audioprobe_data.
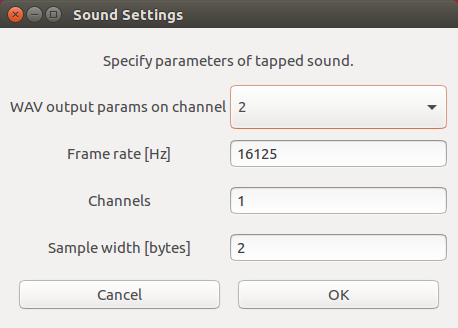
If you have changed the sound parameters in the Smart Remote firmware, you must adjust parameters of the recorded audio. The sound settings window can be found in menu Audio Chain under Sound settings (shortcut Ctrl+G). You should adjust these settings if you have altered the following parameters:
- sampling rate,
- channels number (mono, stereo etc.). Note that with ANR algorithm enabled, if you tap audio from the pdm.out probe point or inject audio to the anr.in point, you should choose 2 channels. Otherwise, use 1 channel.
You can examine the audio subsystem configuration using the audio info command. See Audio CLI commands.
Injecting audio
To enable injection of audio, edit the configuration file and increase the number of down channels to 1 (see CONFIG_AUDIO_PROBE_RTT_CHANNELS_DOWN). You will likely run out of RAM memory for firmware. The easiest solution is to change the codec from Opus to SBC or ADPCM, which require much less memory to operate. You can also disable other Smart Remote features.
After compilation, flash the firmware.
Make sure that Smart Remote is paired with a host. If you changed the audio codec, re-pairing is needed.
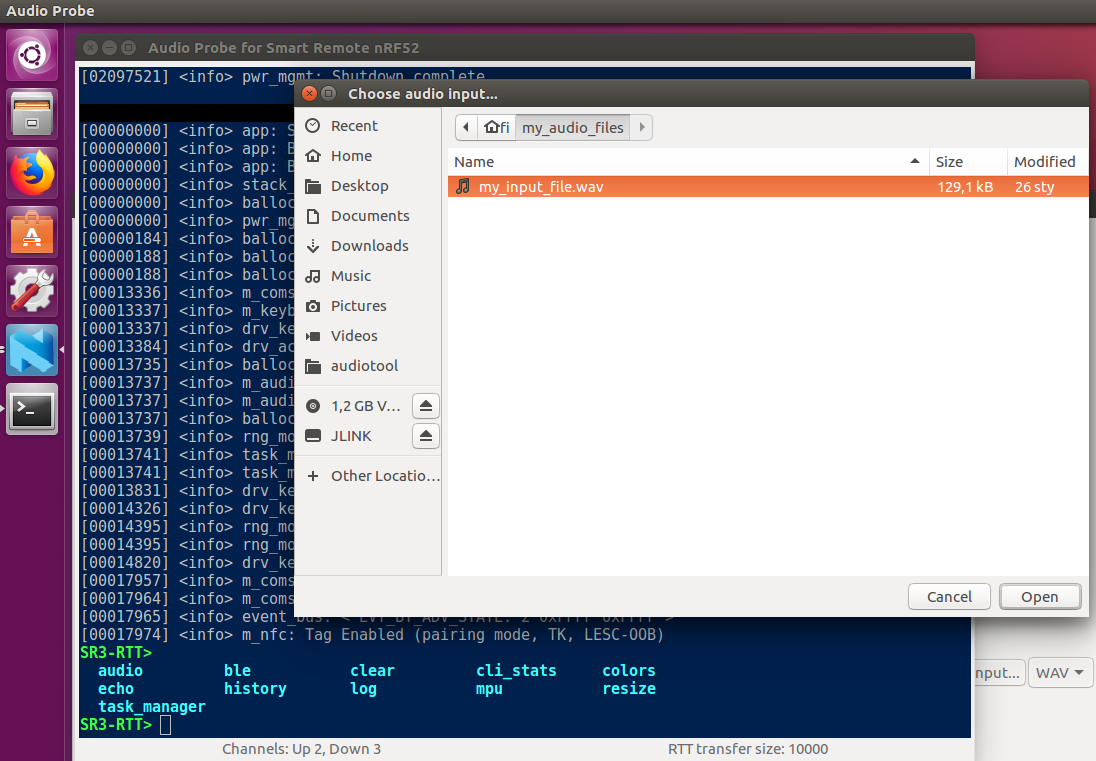
To inject audio to Smart Remote, go to menu Audio Chain and open the Audio Chain Pipes window (shortcut Ctrl+A). In this window, select the input file in WAV format and connect the input audio channel to the chosen inject point.
- Note
- Your input audio file must match the sound parameters of Smart Remote (by default, 16.125 kHz mono with 16-bit sample).
You can check the active inject points with Ctrl+S. Next, start audio streaming, as described in section Tapping audio.
The injected sound is expected to be observed instead of microphone samples, for example when using Google voice search.
Memory usage
In the configuration file, it is possible to choose the size of the queue of audio buffers to be kept in RTT audio channel for audio tapping and audio injecting. However, keep in mind that audio buffer size depends on the chosen codec, frame size, and bit rate. To get information about these parameters, use command audio info.
You will see information about the number of samples in a frame. With a 16-bit sample, the size of uncompressed audio frame in bytes is twice as big as the number of samples. The final size of the RTT audio channel is visible in menu RTT under RTT channels info. The size of the tap channel is the size of the audio buffer in bytes multiplied by CONFIG_AUDIO_PROBE_RTT_TAP_BUFFERS. The size of inject channel is the size of the audio buffer in bytes multiplied by CONFIG_AUDIO_PROBE_RTT_INJECT_BUFFERS.
If the buffer size is too small, some audio data is lost. The exact behavior depends on RTT setting SEGGER_RTT_CONFIG_DEFAULT_MODE, which can be found in sdk_config.h. There are three modes available for RTT where the buffer does not have space for all data: SKIP (do not block, discard data), TRIM (do not block, put as much data as fits into the buffer), and BLOCK (wait until there is space in the buffer). The default is SKIP. For an isochronous audio stream, regardless of the mode used, if the buffer is too small, you will observe discontinuities in the recorded/injected sound.
The Smart Remote firmware issues a warning if there is not enough space in the RTT buffer for audio tap, or if there is no data in the inject buffer.
- Warning displayed when the RTT up buffer for audio tapping is too small: <warning> m_audio-probe: Tapped an incomplete audio buffer. Recorded sound may be corrupted.
- Warning displayed when the RTT down buffer for audio injection is too small: <warning> m_audio-probe: Injected audio buffer incomplete. Discarding injected data.