You can either add a Thingy using Bluetooth® or the NFC tap-to-connect function enabled in firmware 2.0.0 and later.
The steps below show the Bluetooth method. For the NFC
method, see Connecting Thingy using NFC.
-
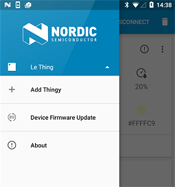
To switch to the menu section that allows for device management, tap the arrow
 next to the Thingy name.
-
Tap Add Thingy.
-
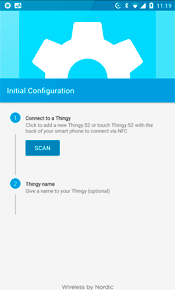
To scan for a nearby Thingy, tap Scan in the Initial
Configuration.
Once you have discovered the one you want, you can connect to it, add a name, and share the location. The procedure is the same as during the first launch. See Connecting Thingy. You can tap X any time to cancel the process.
Once you have added a Thingy to your app, the main menu will contain a new device.
The currently selected Thingy is always shown at the top of the list.