Smart Remote features an extended debugging infrastructure that is based on the nRF5 SDK v14.2.0 Logger and Command Line Interface modules.
The logger is the main communication channel between the developer integrating the system and the firmware.
You can use three backends to work with the logger and CLI.
- Real Time Terminal (RTT)
- UART
- Bluetooth Low Energy (BLE)
The RTT logger with CLI is by default enabled in nRF52832 projects.
In nRF52810 projects, the logger is by default disabled. See Working with Smart Remote 3 for nRF52810 for instructions on how to enable it.
Setting up logger and CLI over RTT
RTT communication is established in two steps:
- J-Link Commander is used to start an RTT connection,
- a telnet client is used for communication over the RTT channel.
To set up communication over RTT, download and install J-Link.
Using RTT on Windows
To communicate over RTT, you need a telnet client. On Windows, PuTTY is recommended.
- Note
- Using RTT Viewer may result in incorrect display of data from the logger and CLI.
Make sure "jlink.exe" is in your PATH system variable. To start J-Link and automatically connect to Smart Remote, run
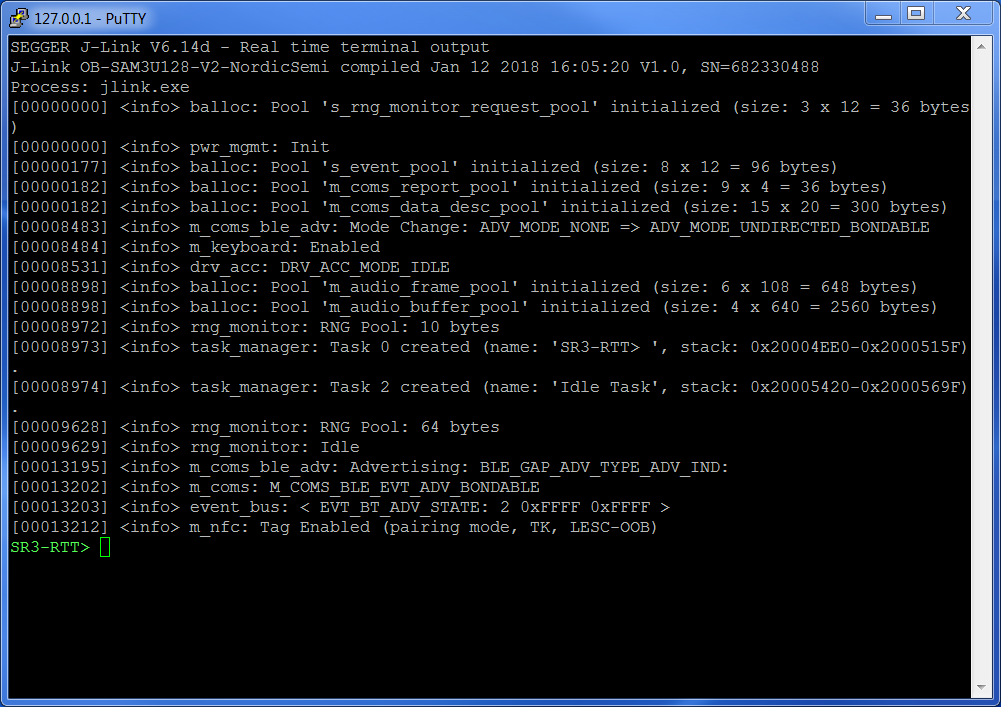
You will see the J-Link Commander starting and connecting to the device.
When connecting to the device, J-Link starts a telnet server which can be used for bidirectional communication. To connect, run a PuTTY session with the settings described here. Logging data from Smart Remote appears with the possibility to issue CLI commands.
If you do not see logs from Smart Remote, restart the device from J-Link console with r (reset) and g (go).
J-Link>r
J-Link>g
The device only starts logging on RTT if the debugger is connected on startup.
Using RTT on Linux
To communicate over RTT on Linux, install J-Link software. Make sure JLinkExe and JLinkRTTClient are in your system path. Then, run:
JLinkExe -autoconnect 1 -device NRF52832_XXAA -if SWD -speed 4000
In a separate terminal, start the RTT client.
JLinkRTTClient
If you do not receive logs from Smart Remote, go to the JLinkExe terminal and reset the device using r (reset) and g (go).
RTT logger and CLI also work with the terminal in Audio Probe.
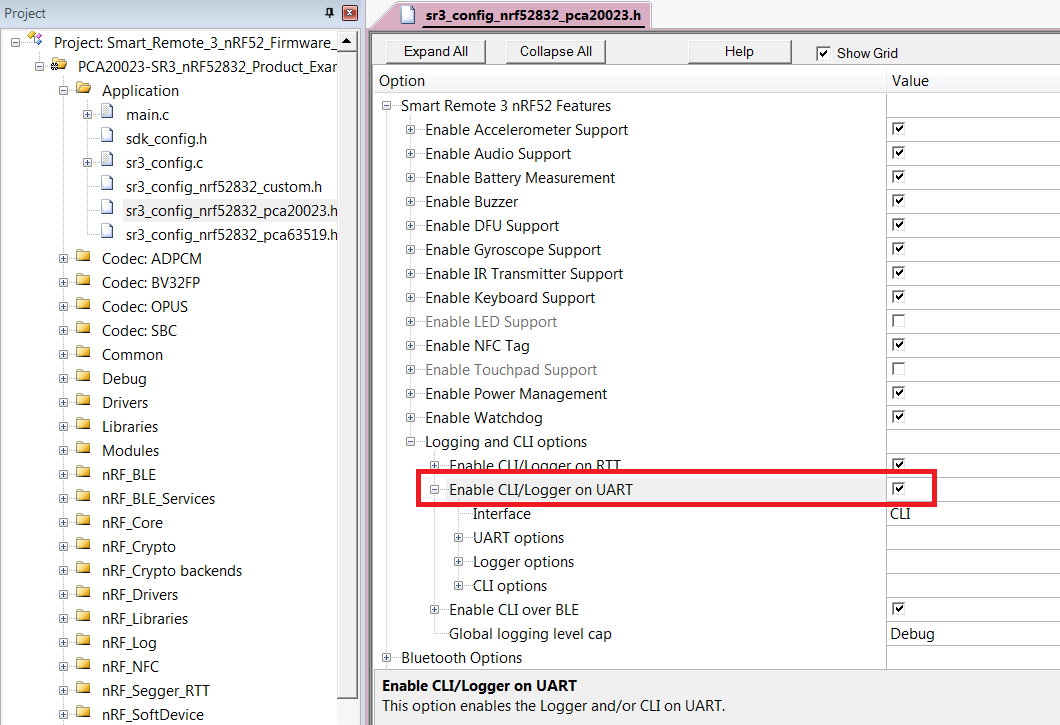
Communication over UART
To enable communication over UART, compile the firmware with the option CONFIG_CL_UART_ENABLED. You can set UART pins with CONFIG_UART_TX_PIN and CONFIG_UART_RX_PIN. For the Shield target, the UART pins are preconfigured. The UART baud rate can be set with CONFIG_CL_UART_BAUDRATE. Parity can be set with CONFIG_CL_UART_PARITY. Hardware flow control can be enabled with CONFIG_CL_UART_HWFC.
Communication over BLE
You can communicate with Smart Remote over a wireless Bluetooth Low Energy link.
Bluetooth Console is provided in NVS 5.4 Ubuntu LiveCD to give access to logger and CLI over BLE.
Logger configuration
In Smart Remote, each event is logged with a timestamp (value in the brackets), which is the time since the firmware start expressed in RTC ticks (one RTC tick = 1/32768 s). When the logger "deferred" mode is used (this is the default setting), logging does not impact time-sensitive tasks. Instead, they are saved in a queue and processed in idle state. See logger documentation for details of log processing.
It is possible to log events on different levels of severity. Five levels are available – Debug, Info, Warning, Error, and None. The logging system is highly configurable:
- The number of debugging events generated by each module is controlled by Module logging level available under Logging Options for each Smart Remote feature.
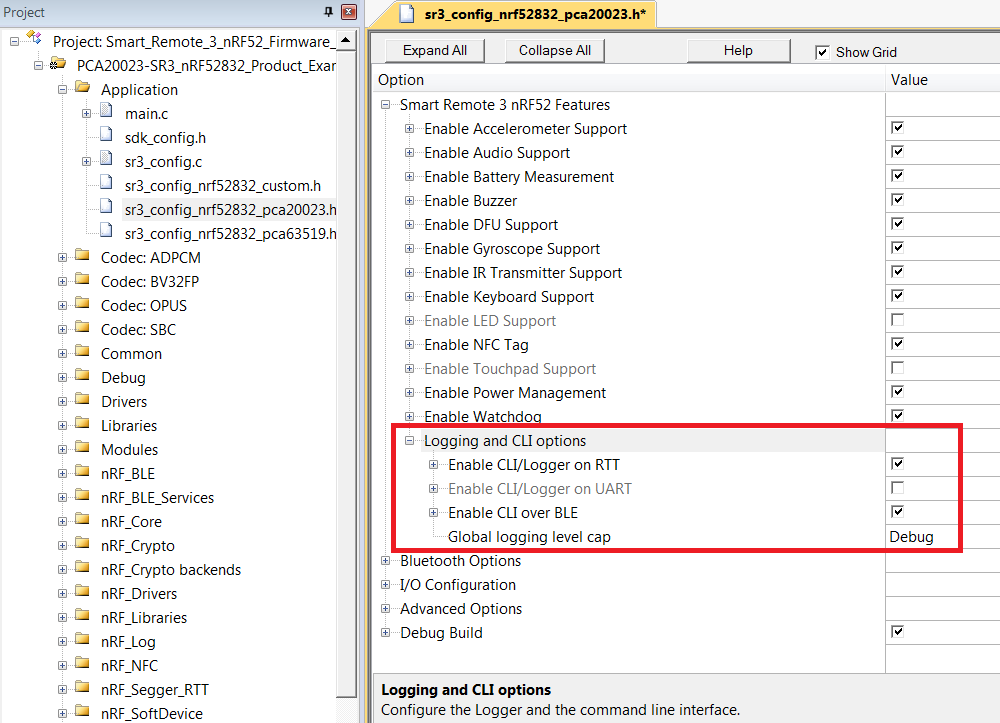
- Logging level limit is set separately for RTT, UART, and BLE transports.
- Logging level can be limited globally for the whole firmware at compile time with CONFIG_LOG_LEVEL_CAP.
The final number of log messages (compiled-in limit) depends on the strictest of the above log level settings. When CLI console is used, the log level limitation of the backend is not taken into account. With CLI, the backend logging level is just an initial setting which can be changed.
- Example 1: user sets NFC logging level to Debug and the global logging level cap to Warning.
Only messages of level Warning or higher (Warning and Error) are printed out.
- Example 2: user sets NFC logging level to Debug, global logging level cap to Debug, RTT logging level to Info, and UART logging level to Warning.
On RTT, only messages of level Info or higher (Info, Warning, and Error) are printed out.
On UART, only messages of level Warning or higher are printed out.
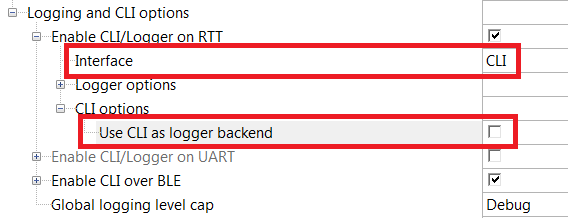
On each backend (transport), it is possible to use only the logger (one-way communication) or the logger with the console (two-way communication). An exception is the BLE backend, where using the logger without the console is not possible.
The console can be also used without the logger. To enable the console without the logger on a specific backend, choose the CLI interface and disable the option Use CLI as logger backend.
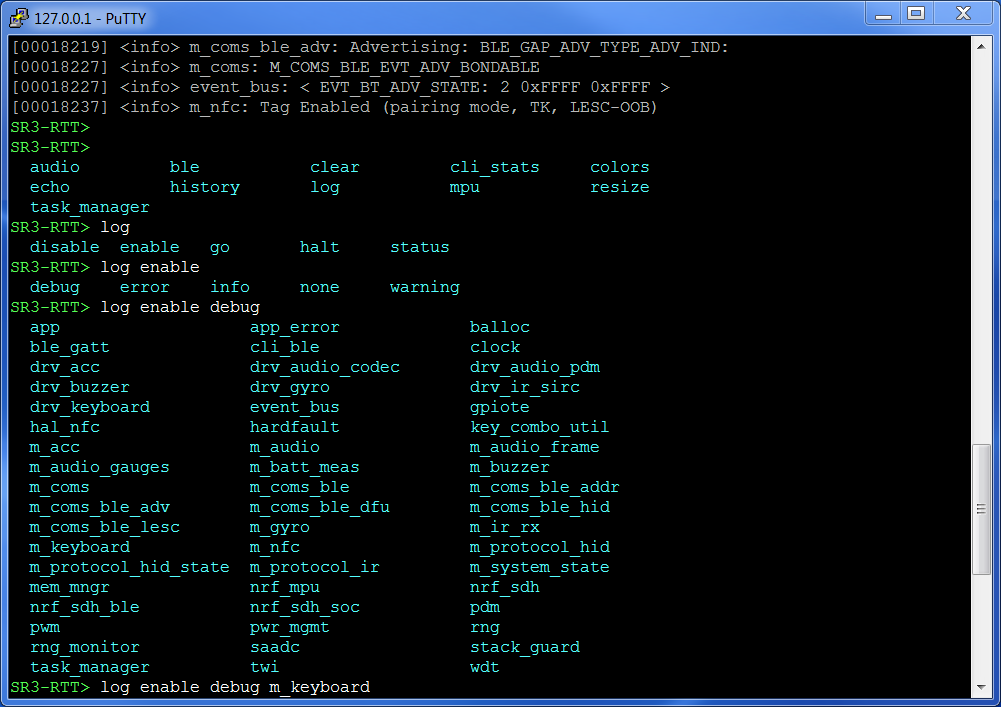
When the CLI is used, the number of logged events can be dynamically filtered at runtime for each module and each backend independently using the log command. The same module can have different logging settings on different backends.
To see the current runtime logging levels, use the log status command.
- Note
- Setting logging level at runtime is possible up to the compiled-in limit, which is specified by the global cap, transport logging level, and compiled-in module logging level.
- Example 3: user sets NFC logging level to Info, global logging level cap to Debug, and BLE logging level to Warning.
By default, the messages of level Warning or higher are printed out.
With CLI commands, it is possible to set dynamic logging level at runtime up to the global cap, in this case to Debug, Info, Warning, or Error.
When connected to CLI over BLE, the user can issue a command likelog enable debug m_nfcto set runtime NFC logging level to Debug.
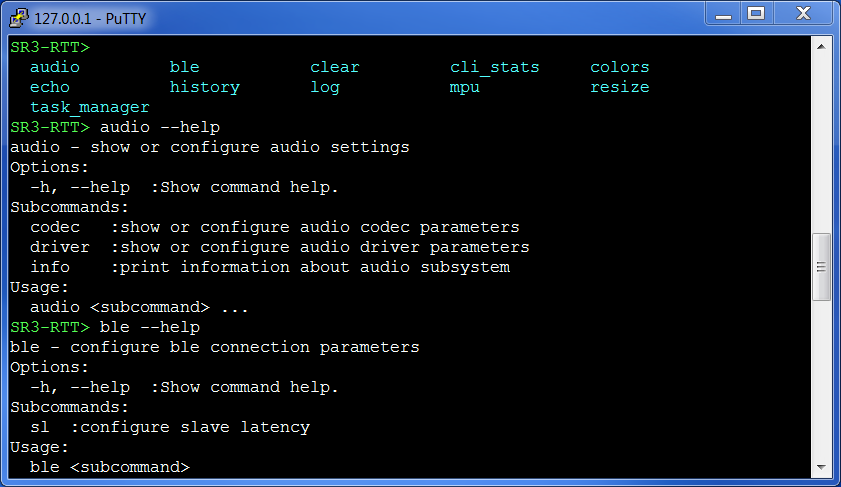
CLI commands in Smart Remote
Smart Remote comes with some built-in commands which help the user inspect and control the system. Users can register their own commands.
For a list of commands available, press Tab. To receive information about each command, use the --help switch. Autocompletion is also available for each command and subcommand.