Table of Contents
The nRF Sniffer for 802.15.4 can help you efficiently analyze Thread and Zigbee network traffic during development, when you need to check what kind of data is wirelessly transmitted over these networks in real time. The captured frames are passed to Wireshark, which decodes the Thread, Zigbee, and other protocols based on the IEEE 802.15.4 MAC. This provides complete information about the messages that are sent in mesh networks.
Requirements
To set up the sniffer, you need the following hardware and software.
Required hardware
- One of the following:
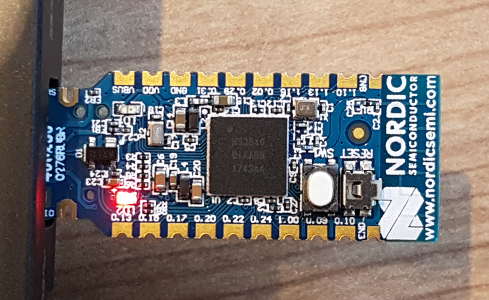
- nRF52840 PCA10056 Development Kit, or
- nRF52840 PCA10059 Dongle
- PC running a Linux-based operating system, Windows, or MacOS
Required software
- Wireshark 2.4.5 or newer
- Python 2.7, Python 3.6 or newer
- Python packages:
- Windows: pySerial Python package from pip
- Ubuntu Linux – install one of the following:
- pySerial Python package from pip
- python-serial
- python3-serial
- nrfjprog – available in nRF5x Command Line Tools
- Sniffer firmware binary – see Obtaining the firmware
- git
Additional requirement for PCA10059 Dongle
- nRF Connect for Desktop with Programmer application installed. See nRF52840 Dongle for more information.
Installation
Before you start using the sniffer, complete the required installation steps: obtain the firmware, flash it, and install Wireshark and extcap plugin.
Obtaining the firmware
To obtain the precompiled firmware, clone the nRF Sniffer for 802.15.4 repository from GitHub:
The repository comes with the precompiled firmware for both PCA10056 Development Kit and PCA10059 Dongle. It also contains the extcap file for Wireshark and extra utilities. See README.md in the repository main level for more information.
Flashing the firmware
Depending on your hardware choice, you must flash the firmware on either the development kit or the dongle.
PCA10056 Development Kit
Connect the nRF52840 Development Kit through the J-Link USB port and flash the sniffer image by running the following command:
PCA10059 Dongle
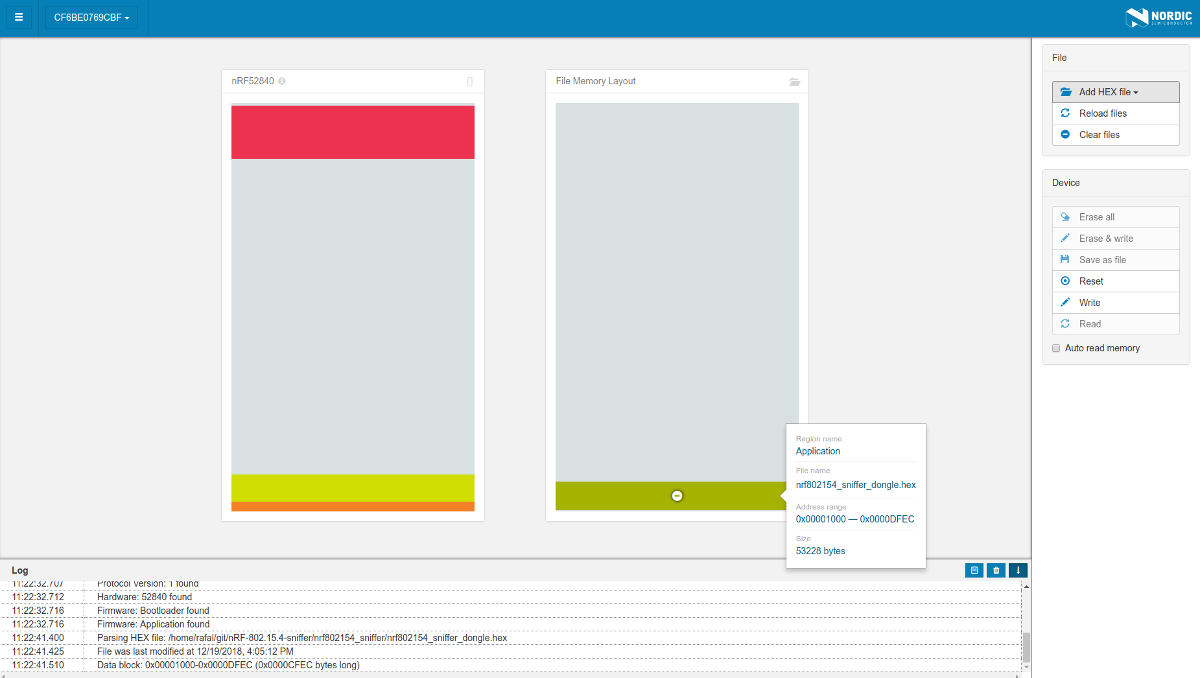
To flash the firmware on the dongle:
- Insert the nRF52840 Dongle into an USB port.
- Press the reset button to enter the DFU mode. The LD2 LED starts blinking red.
- Launch nRF Connect for Desktop and start the Programmer application.
- From the list of devices, select Nordic Semiconductor DFU Bootloader.
- Click Add HEX file and select the correct firmware for the dongle.
- Ensure that the beginning of the address of the firmware image is 0x00001000. If a wrong hex file is selected, the MBR section might be overwritten.
- Click Write to flash the firmware.
- Remove the dongle from USB port and insert it again. Do not press the Reset button.
Installing Wireshark and extcap plugin
- Note
- Regardless of your operating system, to install Wireshark and extcap plugin you need the Wireshark extcap folder path that you can find in
Help -> About Wireshark -> Folders -> Extcap path.
To install the Wireshark and the extcap script, depending on your operating system:
- On Ubuntu Linux:
- Run the following commands: sudo add-apt-repository ppa:wireshark-dev/stablesudo apt-get updatesudo apt-get install wireshark
- Copy extcap file from nrf802154_sniffer/nrf802154_sniffer.py to the Wireshark extcap directory.
- Run the following commands:
- On Windows:
- Download and install Wireshark from the official website.
- Copy the nrf802154_sniffer.bat file from nrf802154_sniffer/ folder to the Wireshark extcap directory.
- Ensure that Python installation directory is included in PATH variable.
- Copy extcap file from nrf802154_sniffer/nrf802154_sniffer.py to the Wireshark extcap directory.
Connecting the sniffer to the host
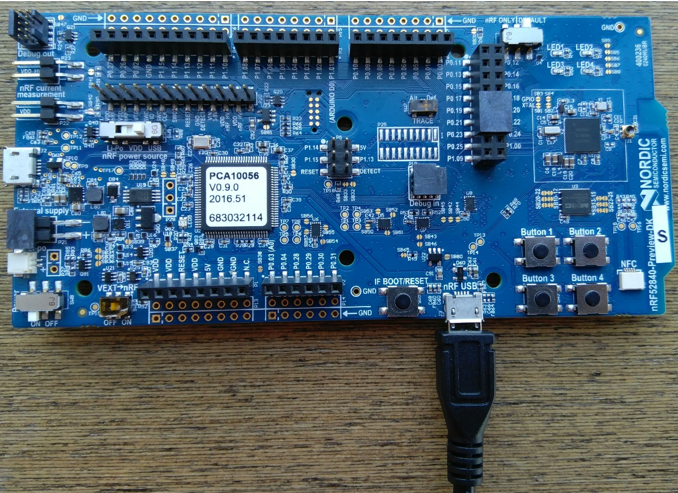
After the configuration, connect the flashed development kit to the host as shown in the image.
Starting Wireshark with the sniffer
Before starting Wireshark on Ubuntu Linux, configure user permissions for Wireshark if necessary. Installing Wireshark should create a wireshark user group. Only users belonging to that group can capture from network interfaces.
To start Wireshark with the sniffer:
- Start Wireshark.
- Click the gear icon next to the nRF Sniffer for 802.15.4 capture interface. The interface options window appears.
- Select the channel and the correct serial port for the sniffer.
 Sniffer capture channel and device configuration.
 - Start the capture.
Configuring Wireshark for Thread
To capture the data for Thread examples in SDK, you must manually configure Wireshark:
- Press Ctrl + Shift + P to enter the Wireshark preferences.
- Go to Protocols -> IEEE 802.15.4.
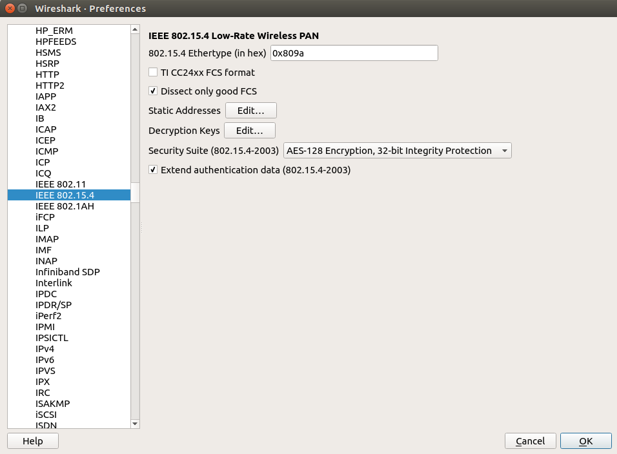 Wireshark - Preferences window
 - Click the Edit button next to Decryption Keys. The Keys window appears.
- Edit the decryption key to the following settings:
- Decryption key:
00112233445566778899aabbccddeeff - Decryption key index:
0 - Key hash:
Thread hash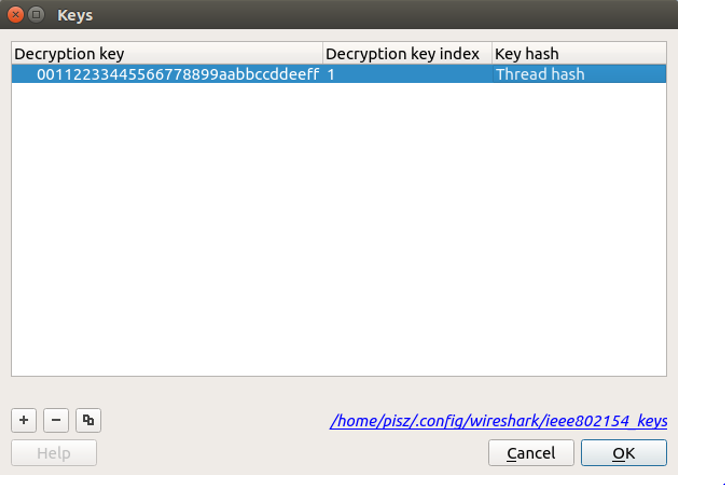 Decryption keys window
- Decryption key:
- Go to Protocols -> Thread and edit the settings.
- Thread sequence counter:
00000000 - Use PAN ID as first two octets of master key: Deselected
- Automatically acquire Thread sequence counter: Selected
- Thread sequence counter:
- Go to Protocols -> 6LoWPAN and edit the settings.
- Derive ID according to RFC 4944: Deselected
- Context 0: fdde:ad00:beef:0::/64
- Context 1:
64:FF9B::/96– for working with Nordic Thread Border Router - Context 2: Native IPv6 global prefix that is being propagated in the Thread Network.
- Go to Protocols -> CoAP and edit the settings.
- Set CoAP UDP port to:
61631
- Set CoAP UDP port to:
Configuring Wireshark for Zigbee
To capture the data for Zigbee examples in SDK, you must manually configure Wireshark:
- Press Ctrl + Shift + P to enter the Wireshark preferences.
- Go to Protocols -> Zigbee.
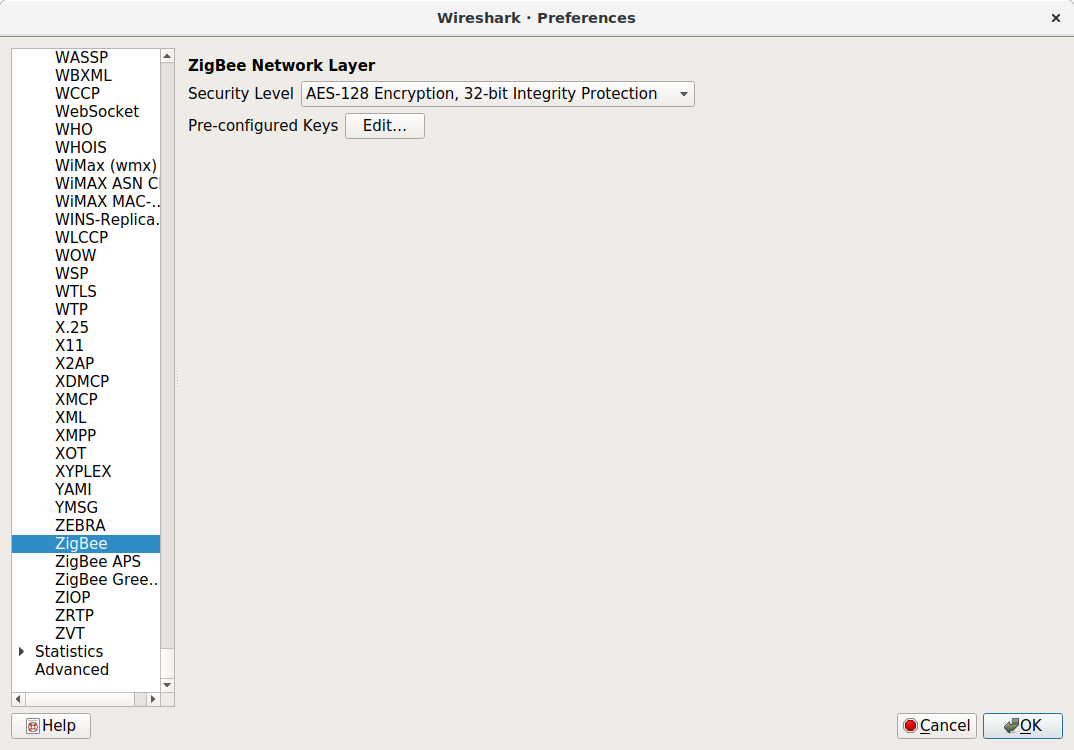 Wireshark - Preferences window
 - Click the Edit button next to Pre-configured Keys. The Pre-configured Keys window appears.
- Add two entries by clicking on the "+" button:
- Key:
5A:69:67:42:65:65:41:6C:6C:69:61:6E:63:65:30:39, Byte Order: Normal, Label: ZigbeeAlliance09 - Key:
ab:cd:ef:01:23:45:67:89:00:00:00:00:00:00:00:00, Byte Order: Normal, Label: Nordic Examples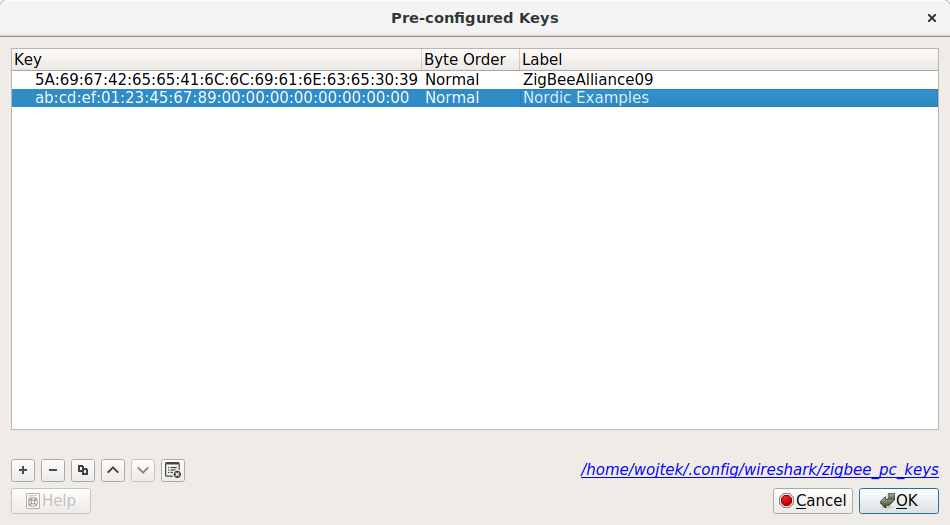 Pre-configured Keys
- Key:
DFU trigger capability for PCA10059 dongle
The sniffer firmware for the dongle supports the DFU trigger, which puts the device in the DFU mode without the need to press the reset button. The Programmer application in nRF Connect for Desktop is able to trigger the DFU mode by simply selecting the appropriate device from list.
Troubleshooting
This section contains some known issues that you can encounter when setting up the nRF Sniffer for 802.15.4.
Permission denied for /usr/bin/dumpcap
Issue:
"Couldn't run /usr/bin/dumpcap in child process: Permission denied."
Solution:
Add the correct USER to wireshark group. Log out and log in again. New user group settings should apply.
Sniffing has started but no data is visible
Issue:
Sniffing has started but no data is visible in Wireshark, or sniffing has hung and no more data can be observed.
Solution:
When this issue appears, power cycle the board and restart the capture in Wireshark.
Sniffer capture using the PCA10059 dongle fails to start.
Issue:
"[ERROR] Nrf802154Sniffer (/dev/ttyACM0) channel 11 did not reply properly to setup commands. Is it flashed properly? Recieved:"
Solution:
Most likely the dongle is still in DFU mode. Unplug the device from USB port and plug it again.
Additional information
For additional documentation, see nRF Sniffer for 802.15.4 on GitHub.