Important: Before you run this example, make sure to program the SoftDevice.
The purpose of the ANT High Duty Search and Background Scanning example is to showcase how to implement a high duty background scanning channel in combination with a master channel on a single device, and how to use extended messages to obtain the RSSI (Received Signal Strength Indication) and channel ID information from the received packets. The example does not utilize any buttons or LEDs.
Description
High duty search is a mode in the ANT protocol that allows slave and background scanning channels to maximize the use of radio time while listening for messages. This allows for extremely low latency pairing times for slave channels, equal to the channel period of the master channel, and a message reception rate for background scanning similar to the continuous scanning mode.
Background scanning channels are a powerful feature of ANT because they allow for asynchronous topologies, while still allowing other channels to run independently on the same device. In this example, the RSSI and channel ID of the messages received on the background scanning channel are copied to the data payload of the master channel, effectively mirroring these parameters back to the transmitting devices. For more details, see the ANT Message Protocol and Usage document, as well as the following application notes: ANT Channel Search and ANT RSSI Extended Information.
As shown in the figures below, this example can work with any number of nodes or it can work with a single development board in conjunction with an ANT USB stick and the ANTware PC application. The instructions in this document describe the second setup. In this example, ANTware will be configured to interface to a single node. A slave channel will be configured in ANTware to track the master channel of the node. A master channel will be opened up in ANTware to match the channel parameters of the background scanning channel.


Operation
After a startup or reset, each ANT node will open up two channels - one background scanning and one master channel. Note that the background scanning channel is configured similarly to a regular slave channel with a flag set to denote its special function. Because a background scanning channel is effectively a searching channel that never synchronizes to any master, it is important to set the search time-out appropriately. In this example the search time-out is set to infinity.
| Parameter | Master channel | Background scanning channel |
|---|---|---|
| Channel type | Master (0x10) | Slave(0x00) |
| Extended assignment | N/A | EXT_PARAM_ALWAYS_SEARCH (0x01) |
| Network key | Public | Public |
| RF channel | 77 (2477 MHz) | 77 (2477 MHz) |
| Channel period | 2048 (16 Hz) | N/A |
| Device number | Serial number | Wildcard (0) |
| Device type | 1 | 1 |
| Transmission type | 5 | 5 |
| Search time-out (high priority) | N/A | No HP search (0) |
| Search time-out (low priority) | N/A | Infinite (255) |
Message format
The master channel on each device sends a single payload of data that indicates the signal strength and channel ID of the last message that was received on the background scanning channel. The format of this message is detailed below.
| Byte | Description |
|---|---|
| 0 | Page number = 1 (ANT_BEACON_PAGE) |
| 1 | RSSI value (signed dBm value, corresponding to the device number) |
| 2-3 | Device number of the last message that was received on the background scanning channel (little endian, corresponding to the RSSI value) |
| 4-5 | Reserved |
| 6 | Counter that increases with each channel period |
| 7 | Number of messages that were received on the background scanning channel |
Setup
You can find the source code and the project file of the example in the following folder: <InstallFolder>\examples\ant\ant_hd_search_and_bs
Testing
Note: You can use a custom channel or encryption when running any of the ANT examples. When adding a new channel or encryption, remember to update SoftDevice ANT event handler configuration.
- Compile and program the High Duty Search and Background Scanning application.
- Run ANTware II. Select your ANT PC dongle (for example, ANTUSB-m) from the available devices. Configure the device channels by loading the device profile configuration from the following file:
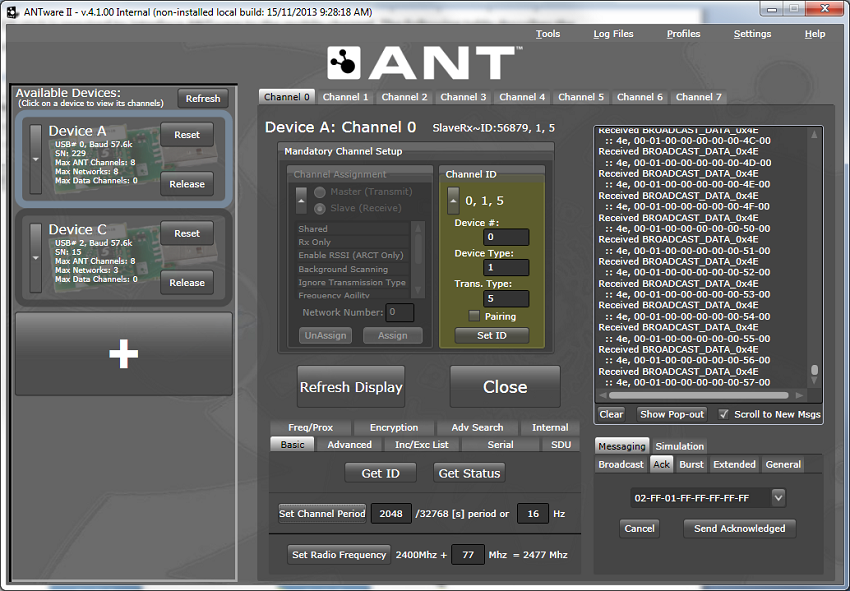
<InstallFolder>\examples\ant\ant_hd_search_and_bs\ant_hd_search_and_bs_test.xml. Alternatively, you can configure the device channels manually:- Channel 0 as a slave with device number 0. Configure the channel according to the information for the master channel, as shown in the table above, but configure it to be a slave channel. Set the Device Number to 0 (wildcard).
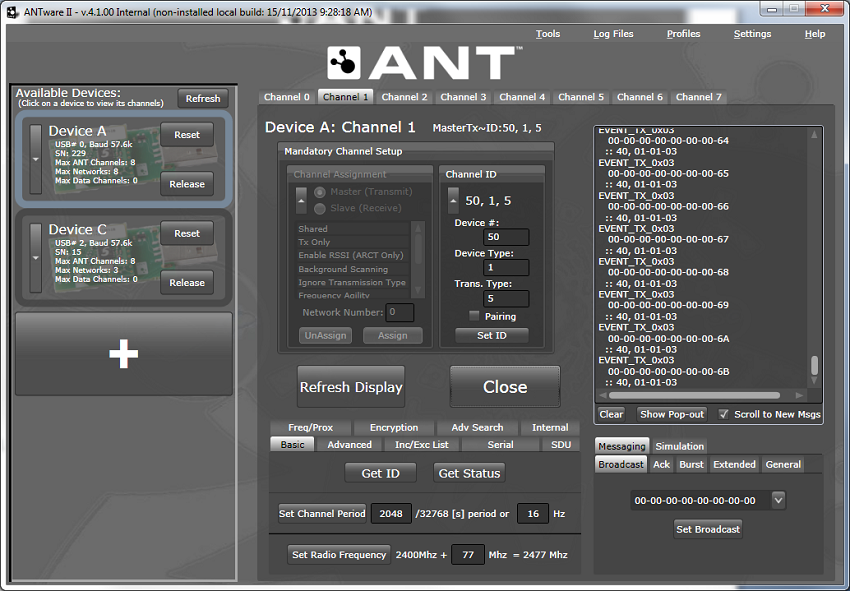
- Channel 1 as a master with device number other than 0. In the figure below, the device number is set to 50. Configure the channel according to the information for the master channel, as shown in the table above.
- Channel 0 as a slave with device number 0. Configure the channel according to the information for the master channel, as shown in the table above, but configure it to be a slave channel. Set the Device Number to 0 (wildcard).
- Observe the message payload received on Channel 0 in ANTware. Note that the channel ID reported will equal 50 and the corresponding RSSI value will change as the development board is moved closer and further away from the ANT USB stick.
- You can configure more master channels in ANTware II. Each channel must use a different device number. The background scanning channel on the device will receive messages from all channels asynchronously and report the received data back to the slave channel.


Note that any number of channels can be configured in ANTware to transmit to the background scanning channel on Node A. Make sure to use a different device number for each of the channels. The background scanning channel will receive messages from these channels asynchronously and report back to the slave channel that is configured in ANTware.