To start developing your own application, you should first test that you set up your toolchain correctly. To do so, compile, program, and run a very simple example that does not use a SoftDevice, for example the Blinky Example.
Make sure that you have all required tools installed and that the board is connected to your computer. See Setting up the development kit (for nRF52840) or Setting up the development kit (for nRF52832) for more information.
Erasing the board
Before you program an example, erase the contents of the board.
If no SoftDevice has been installed on the board, simply open Keil and select Flash > Erase.
If a SoftDevice has been installed on the board or if you are not sure, use nRFgo Studio to make sure that you erase the whole board. Select your device in the Device Manager pane. Then click the Erase All button. If you prefer to use a command line tool instead, use nrfjprog (part of the nRF5x Command Line Tools).
Running the example
To run the example:
- Navigate to the folder that contains the example project:
- Open the folder that contains the SDK files, thus the folder where you extracted the SDK zip file.
- Select the example that you want to run, for example,
...\examples\peripheral\blinky. - Select the board that you want to use, for example,
...\pca10040. - If you want to run the example with a SoftDevice, select the SoftDevice. Otherwise, select blank. So for running the Blinky Example without a SoftDevice, select
...\blank. - Select the toolchain that you want to use. The following steps assume that you are using Keil 5, so select
...\arm5_no_packs.
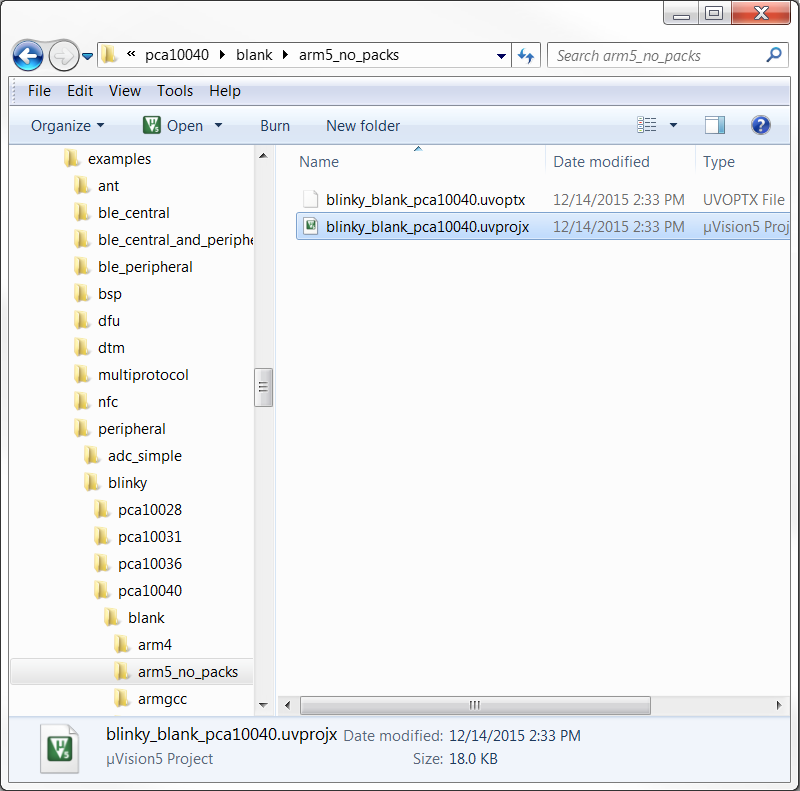 Navigate to the example project
- Double-click the uvprojx file to open the project in Keil.
- Build the project to compile all files.
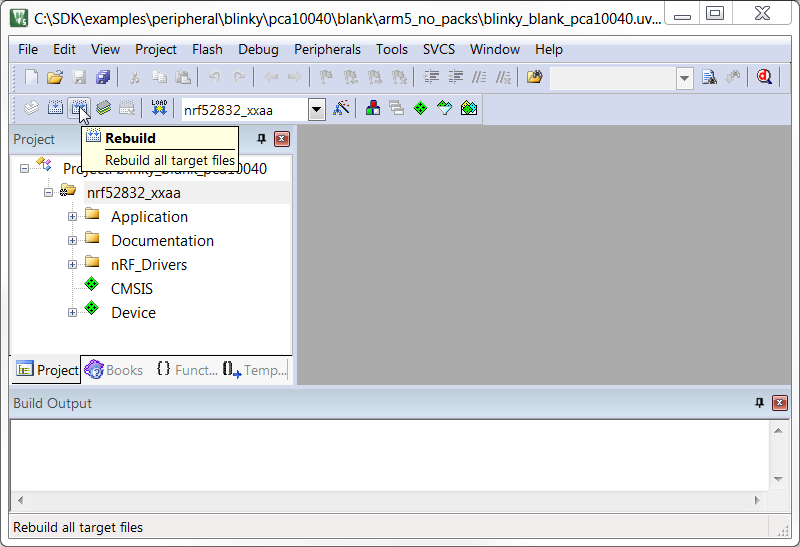 Rebuild all target files
- Download the code to flash memory to flash the project to the board. If Keil prompts you to update to the latest firmware version, select Yes.
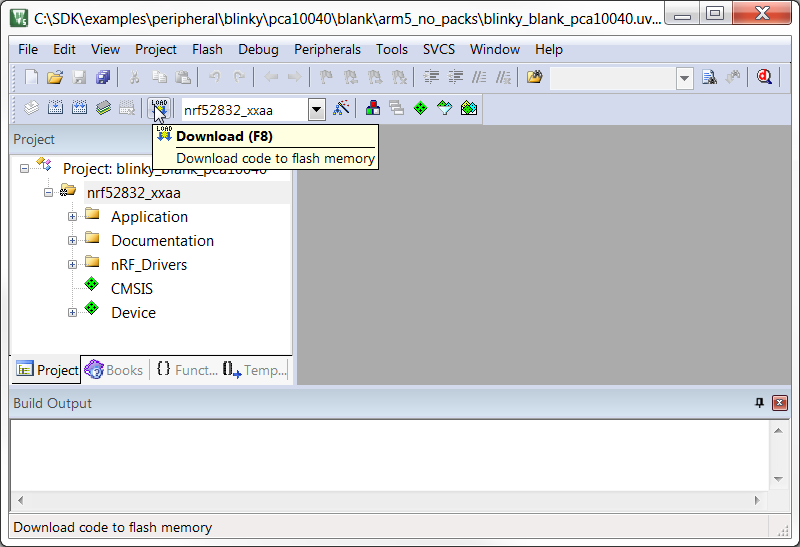 Download code to flash memory
If you have more than one board connected to your computer, you will get an error message when you try to download the code to flash. In this case, configure which board Keil should use:- Select Project > Options for Target 'XXX'.
- Switch to the Debug tab.
- Click the Settings button next to the selected "J-LINK / J-TRACE Cortex" option.
- Choose the serial number of your board from the SN list in the J-Link / J-Trace Adapter area.
- Confirm, then download the code again.
- Test the example as described in the Testing section of the example documentation (Testing Blinky).